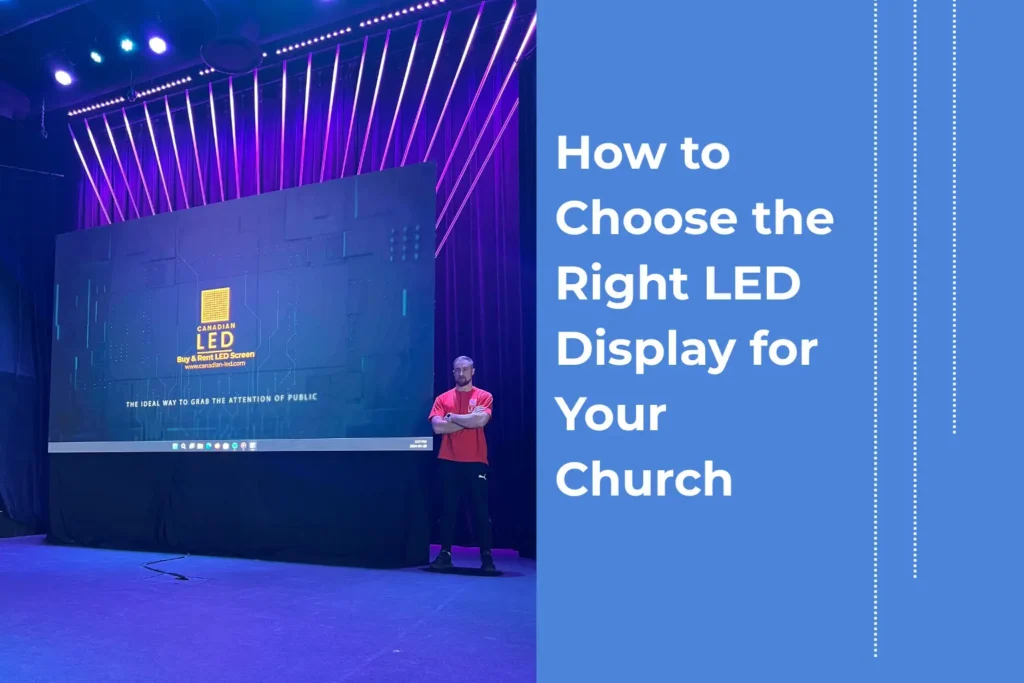
Introduction
Hi everyone, Vitaly here. I’ve spent years working in the field, installing, maintaining, and repairing LED screens across Canada — from church installations and live events to outdoor advertising walls. Over time, I’ve learned that even the best-built LED screens can run into problems. Whether it’s a flickering panel, a dark spot, or a full blackout, these issues can seem intimidating — but most of them have clear, manageable solutions once you know what to look for.
In this guide, I’ll walk you through how I diagnose and repair LED screens based on real-world experience. I’ll also share practical steps you can take to extend your screen’s lifespan and avoid costly repairs down the road.
Understanding How LED Screens Work
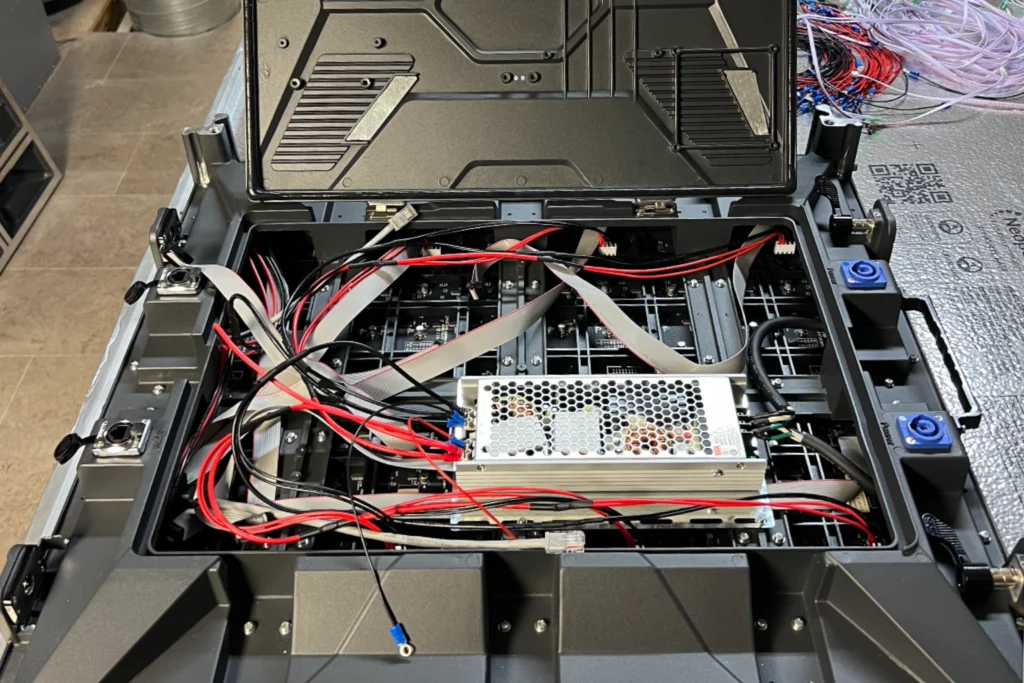
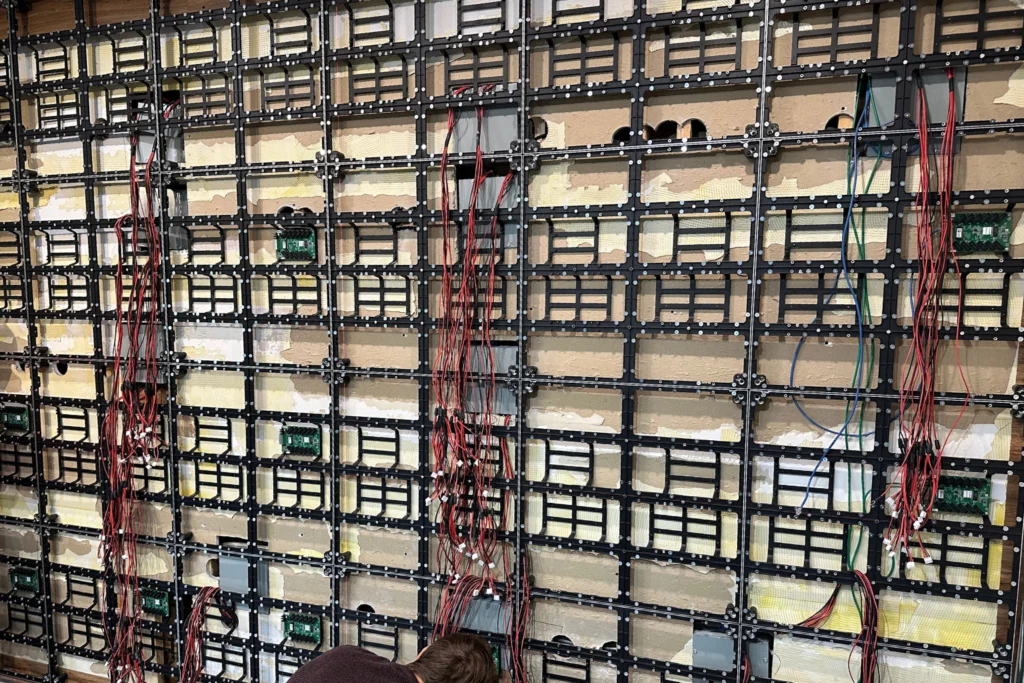
Before we talk about repair, it’s important to understand what’s happening inside your LED display. Every LED screen — whether it’s a small indoor video wall or a massive outdoor billboard — is made up of led wall panels (also called modules). Each panel contains hundreds or thousands of tiny light-emitting diodes (LEDs) that work together to form an image.
Behind those modules are several key systems:
- Power supply units, which deliver stable voltage to each section of the screen.
- Data cables that carry image and video information.
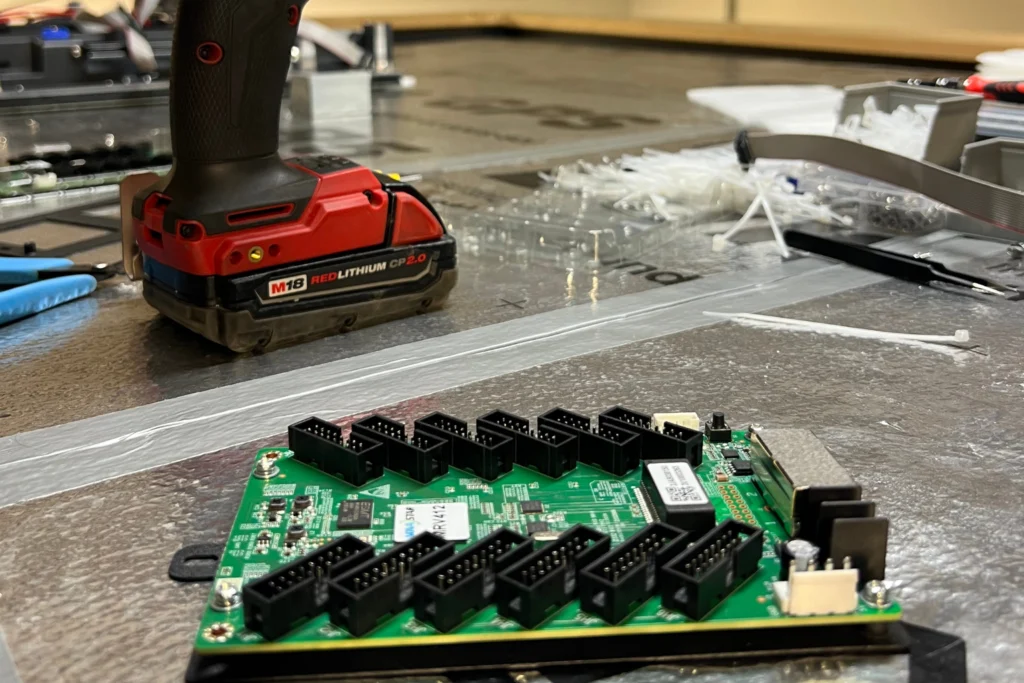
- Receiving and sending cards, which process the signal.
- Cooling systems, which protect against heat buildup.
When something goes wrong, it’s usually one of these components — not the entire display — that needs attention.
Common LED Screen Problems I See
Over the years, I’ve noticed that most LED display issues fall into a few familiar categories:
1. Black or Unlit Screen
If your screen or a section of it won’t light up, the most common culprit is the power supply. It might be as simple as a disconnected AC line or a failed +5V output. I’ve also seen cases where a loose connector or damaged cable between the power supply and the module was the real issue.
2. Dead or Stuck Pixels
These are the small dark or colored dots that don’t respond when the rest of the screen changes. One or two might not seem like a big deal, but over time they can multiply. Dead pixels often come from failed diodes, while stuck pixels might just need recalibration or a quick refresh using pixel-fix software.
3. Color Distortion or Uneven Brightness
If part of your screen looks warmer, greener, or dimmer than the rest, you’re likely dealing with a driver IC issue or calibration error. Extreme temperature or poor ventilation can also cause color drift over time.
4. Flickering or Intermittent Image
A flickering display is usually a sign of unstable voltage or signal interference. I once worked on a stage LED wall that flickered every time nearby audio equipment was powered on — the issue turned out to be electromagnetic interference from unshielded cables.
5. Communication Errors
When the screen displays garbled content or refuses to respond, it’s usually a data or configuration problem. Swapping the network cable or reloading the screen’s control file often solves it.
My Step-by-Step Troubleshooting Process
Every LED screen is different, but my general repair workflow usually follows these steps:
Step 1: Visual Inspection
I start with a quick look. You’d be surprised how often the fix is something simple — a loose connector, a burnt wire, or a module not fully seated. Checking for physical damage saves hours of unnecessary testing later.
Step 2: Power Testing
Next, I use a multimeter to measure voltage on the power outputs. If a 5V line reads low or dead, that power supply unit gets replaced immediately. It’s safer, faster, and usually cheaper than attempting board-level repairs.
Step 3: Data and Signal Testing
If power checks out, I move to data flow. Swapping cables or modules helps isolate where the signal is breaking. I also test the sending and receiving cards to make sure they’re not corrupted or overheating.
Step 4: Module and Component Replacement
When I identify a bad LED module or driver chip, I remove and replace only that component. The beauty of modular LED design is that you rarely need to replace an entire wall — just the damaged part.
Step 5: Calibration and Testing
Once repairs are complete, I power everything back up and run a test pattern: solid colors, gradients, and motion sequences. This helps verify brightness and color consistency across all panels.
I always recommend leaving the screen running for a few hours afterward to confirm that the issue doesn’t return under real load.
Practical Maintenance Tips
Proper maintenance is the best way to prevent most LED issues. Here’s what I recommend to all clients:
- Keep It Clean – Dust and moisture are your biggest enemies. Wipe the modules regularly with a soft, dry cloth — no sprays or water.
- Watch the Temperature – Overheating is a silent killer. Ensure good airflow behind the panels and check that all fans are working.
- Use Stable Power – Always connect LED displays to regulated power or surge protection. A sudden voltage spike can take out half your wall.
- Avoid Static Images – Leaving one image on the screen for too long can cause burn-in. Rotate visuals or use motion when possible.
- Update Firmware and Software – Keeping your control system updated improves stability and image quality.
When It’s Time to Call a Professional
Some repairs — like pixel refreshing or power cable swaps — can be done safely by experienced users. But if you see symptoms like flickering across multiple panels, full-screen color distortion, or random shutdowns, it’s better to call a technician.
As professionals, we use diagnostic software and electrical testing equipment that can detect voltage drop, data lag, and faulty IC chips within seconds. This not only saves time but also prevents accidental damage from guesswork repairs.
If your system is still under warranty, always check with your supplier before attempting a DIY fix. Opening sealed panels or replacing parts yourself can sometimes void coverage.
Real Example: Fixing a Conference Room LED Wall
A few months ago, we got a service call from a conference venue in Edmonton. Their main LED video wall suddenly went dark halfway through a presentation. The event team thought they’d have to cancel the session entirely.
When I arrived, we found that one power supply had failed, causing three modules to go dark. Fortunately, the replacement was quick — we swapped the faulty PSU, checked voltage alignment, and recalibrated brightness across all sections.
In less than an hour, the display was back online, and the client was relieved to avoid replacing the entire wall. They were surprised at how cost-effective it was compared to their initial fear of a full replacement. This is a good example of how understanding the video wall cost structure helps both clients and technicians make smarter repair decisions.
Preventive Thinking: Extending Your Screen’s Lifespan
Most LED screens are built to run 50,000 hours or more, but they only reach that target if properly maintained. I recommend scheduling a professional inspection once or twice a year — especially for outdoor or rental systems.
Regular preventive care — checking cable integrity, refreshing control software, verifying voltage stability — can extend the life of your LEDs by years.
If you’re managing an event or venue, it’s also smart to rent led display equipment from a trusted provider rather than investing in temporary setups yourself. That way, you get professional installation, calibration, and maintenance included.
For those running permanent installations, however, it might make more sense to buy led screen systems designed for long-term indoor or outdoor use. The initial investment can be higher, but over time, ownership gives you better control over customization, maintenance, and visual quality.
Conclusion
Repairing an LED screen isn’t just about fixing a broken part — it’s about understanding how each component interacts and ensuring that the display performs consistently day after day. Whether you’re maintaining a digital billboard, a church display, or a live event setup, the same principles apply: test power first, inspect connections, and handle every module with care.
I’ve repaired hundreds of LED screens, and one thing always stands out — the sooner you address small issues, the less expensive and complicated the fix becomes.
If you’re unsure where to start or just want an expert opinion, our team at Canadian LED can help diagnose the issue and provide a professional repair plan. After all, your screen isn’t just equipment — it’s the centerpiece of your message, and keeping it bright, reliable, and consistent is what we do best.